Make Knit Work: Episode 7

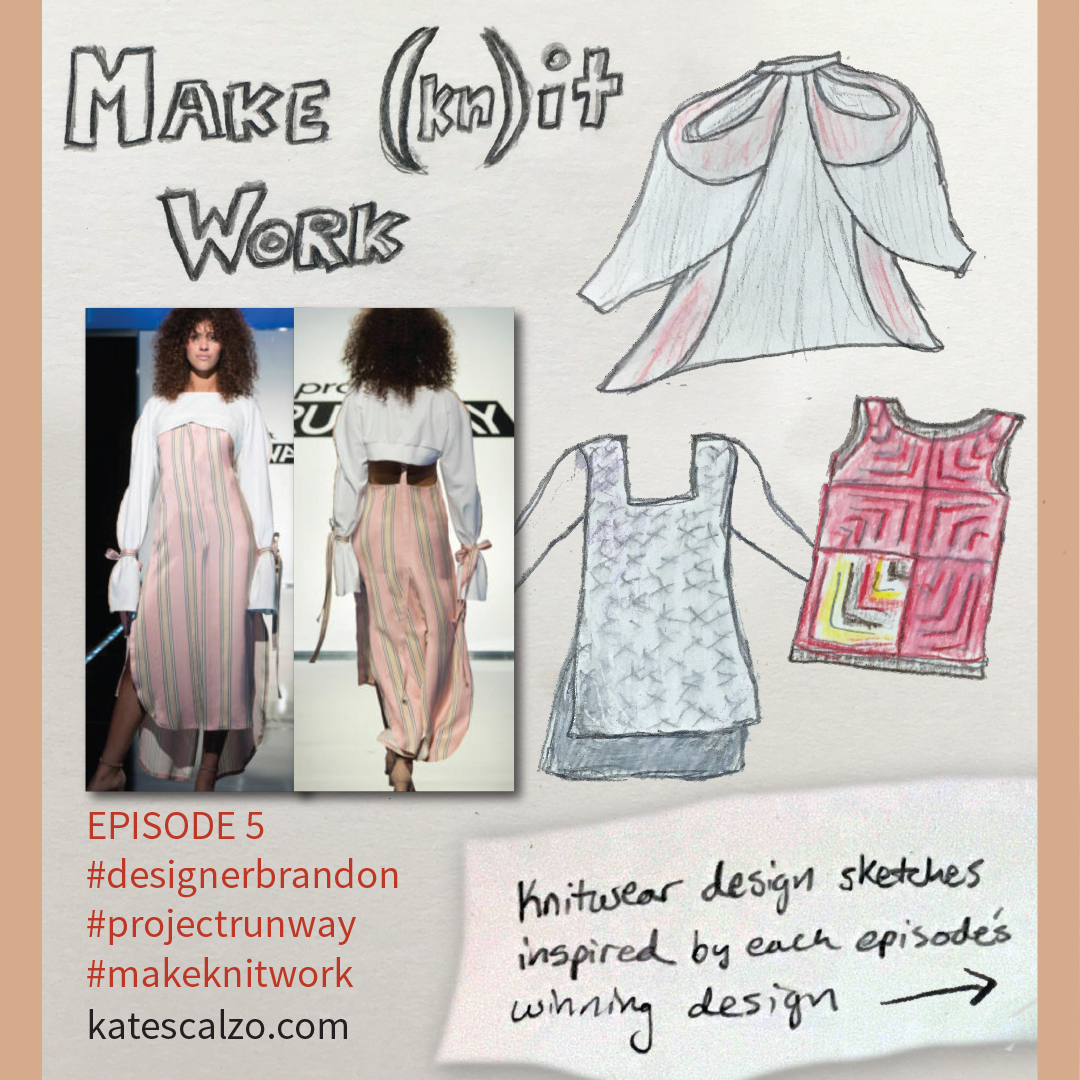
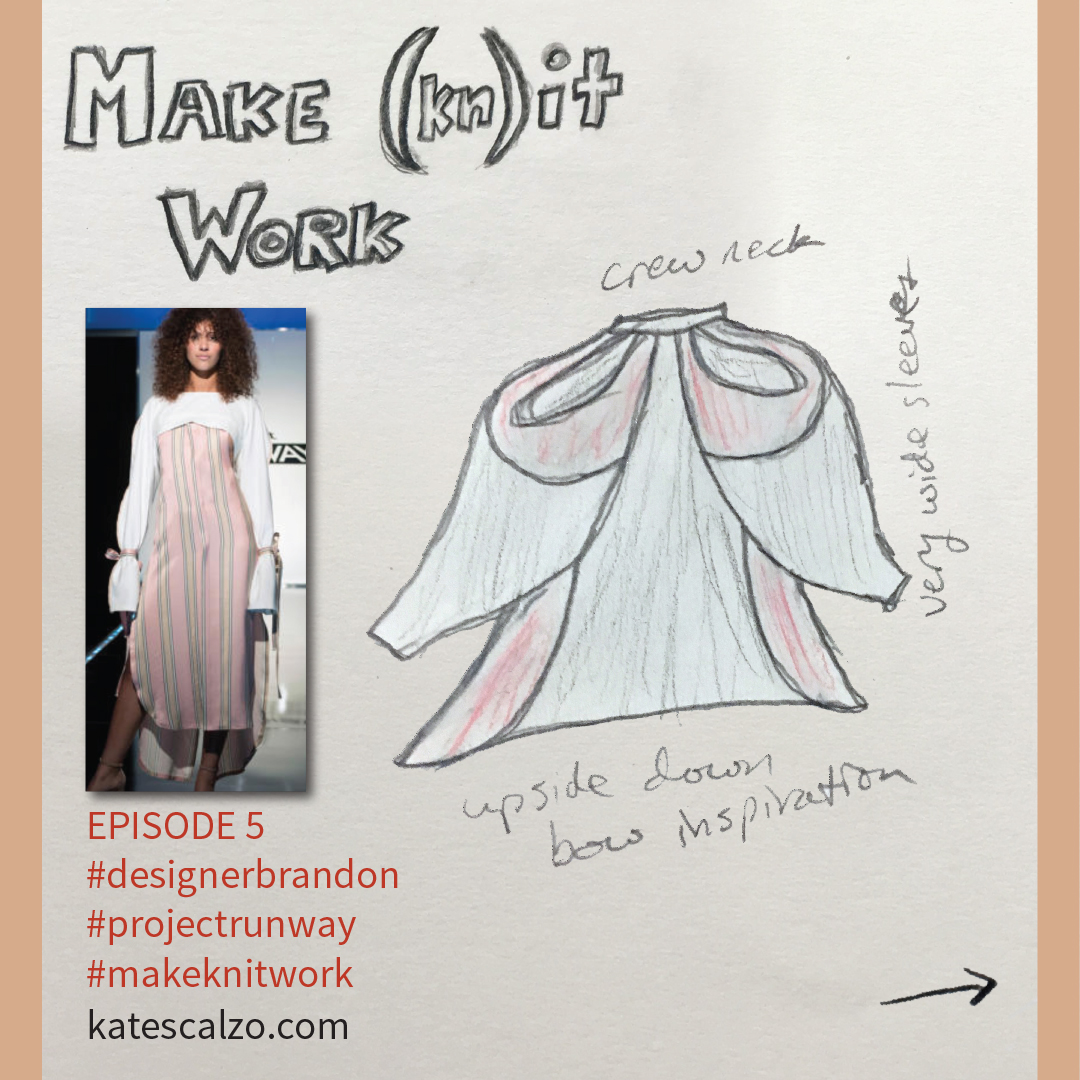
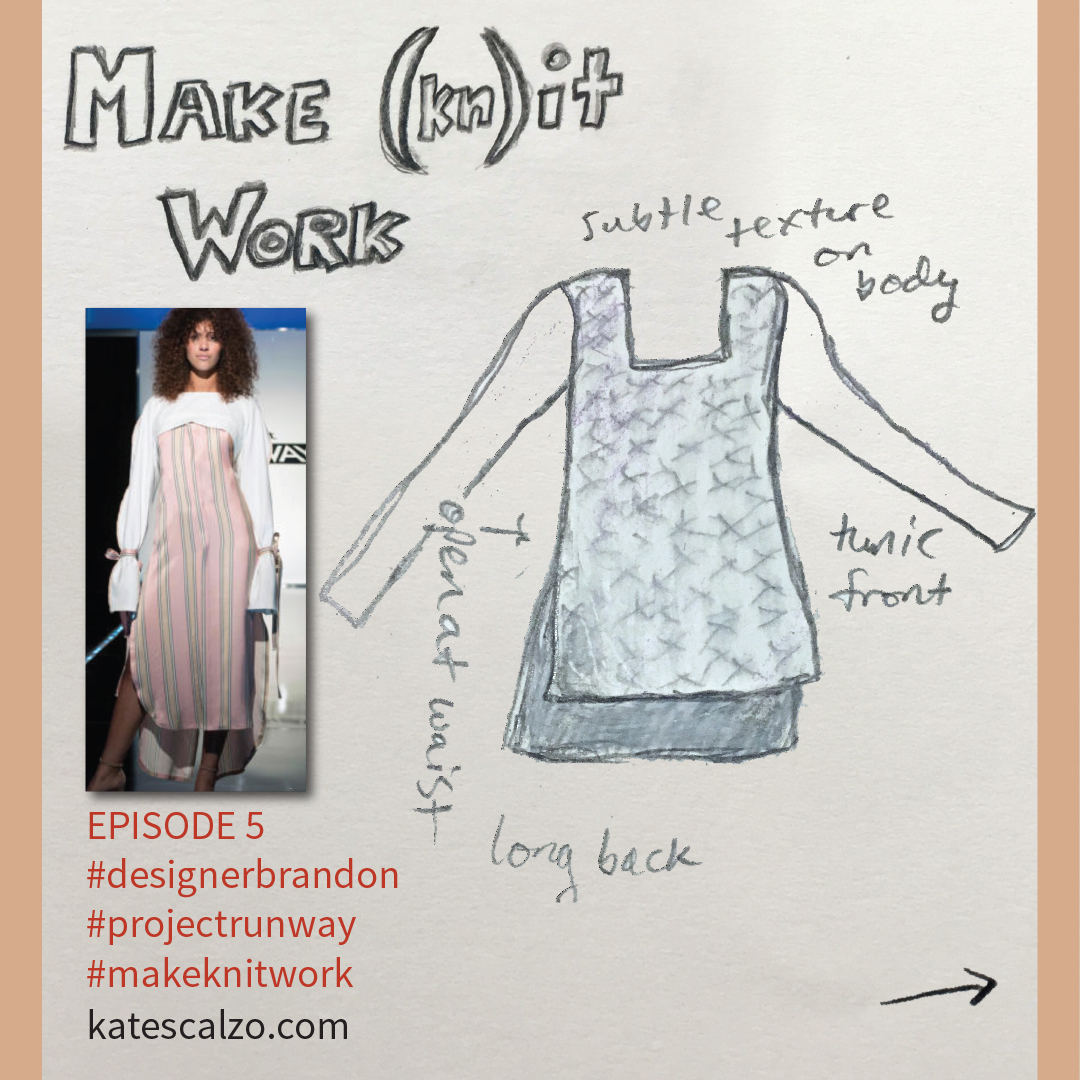
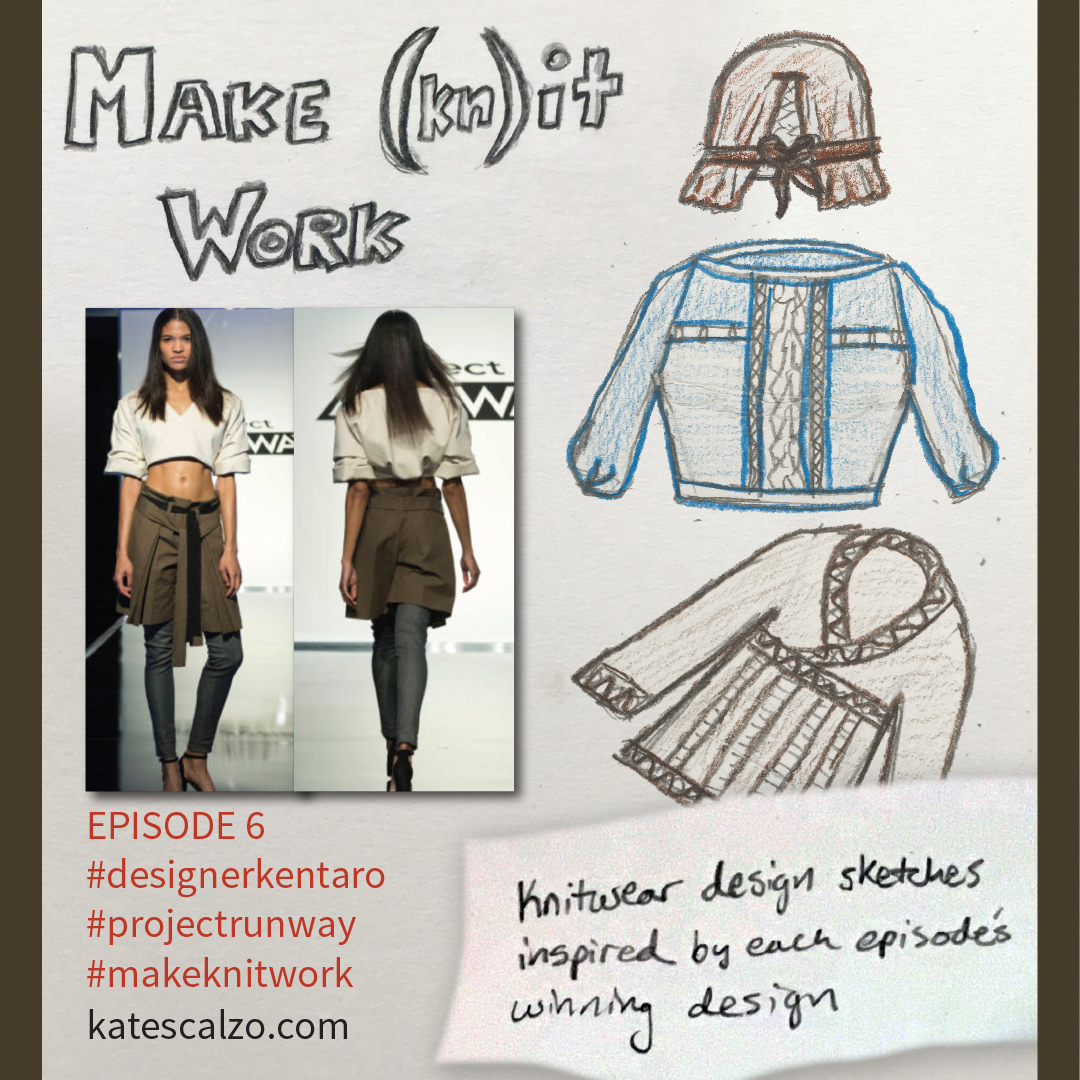
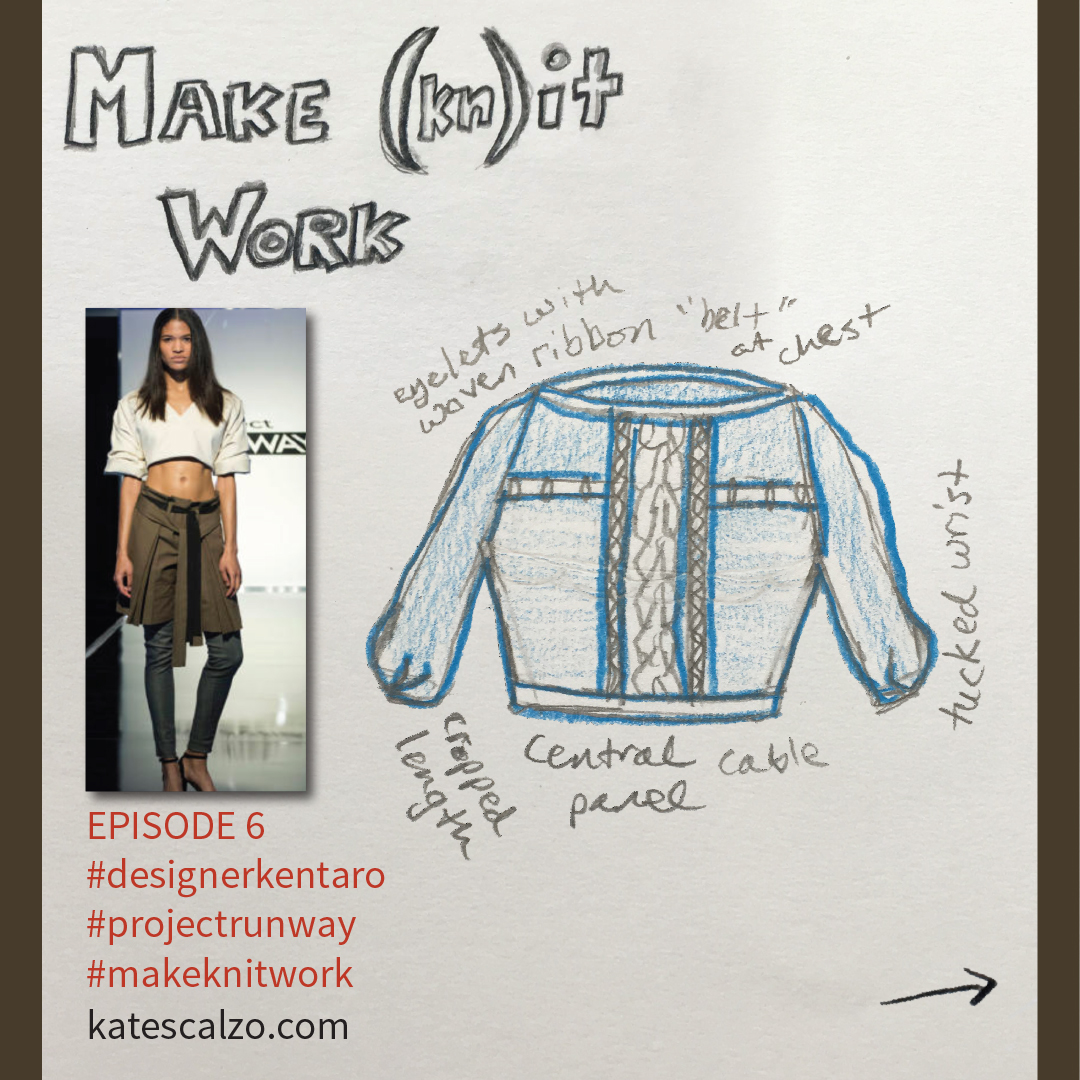
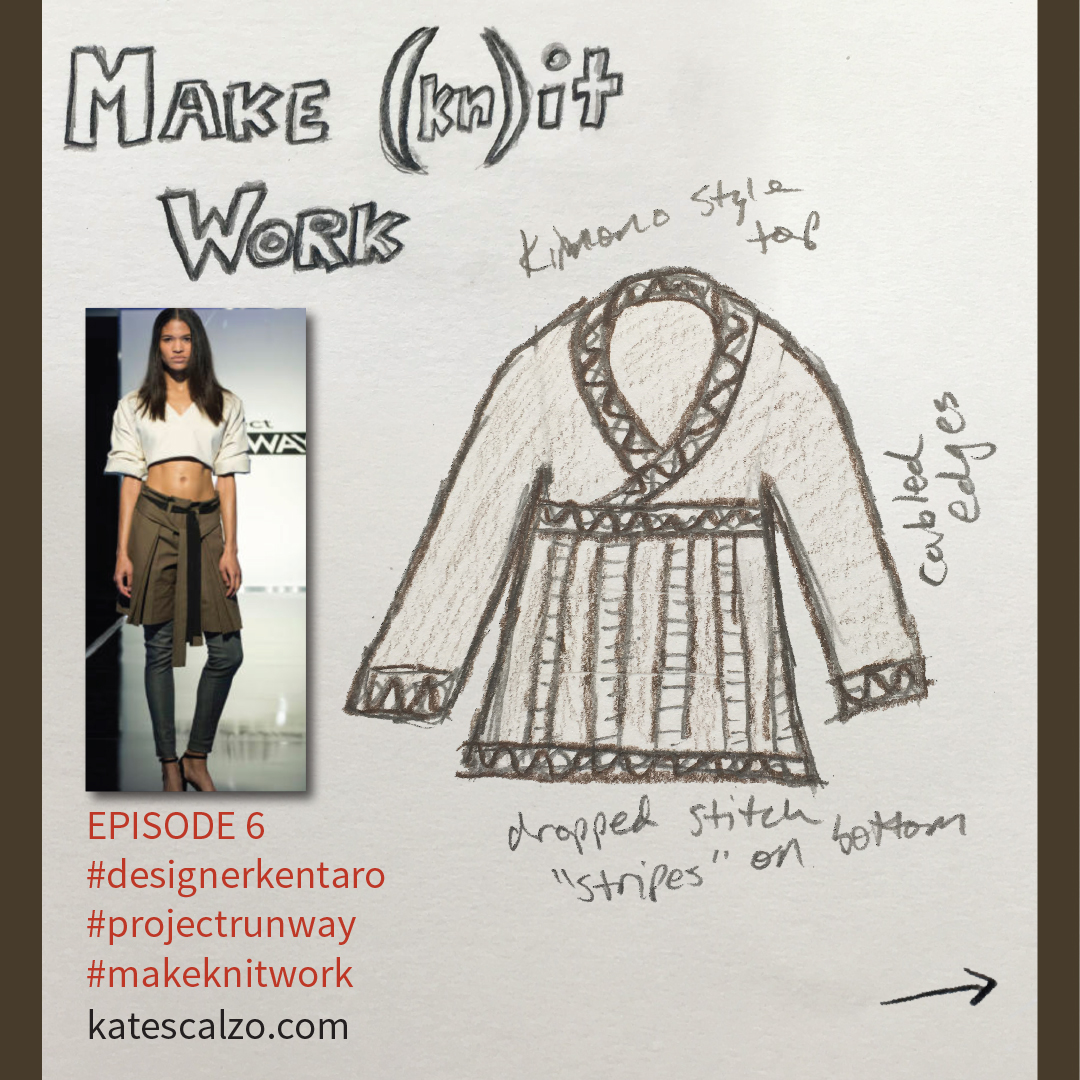
This week's challenge was menswear-inspired, which was a relief for (most of) the designers. No actual menswear today! Margarita Alvarez took on the shirt-dress with a little asymmetry and got the win. I'd wear it! For designing knitwear, though, I was thinking less about the dress shirt and more about the neckties. I love color and patterns. Ties weren't technically part of her dress, but I went with it. I'm glad I did. Here are the designs I sketched out!

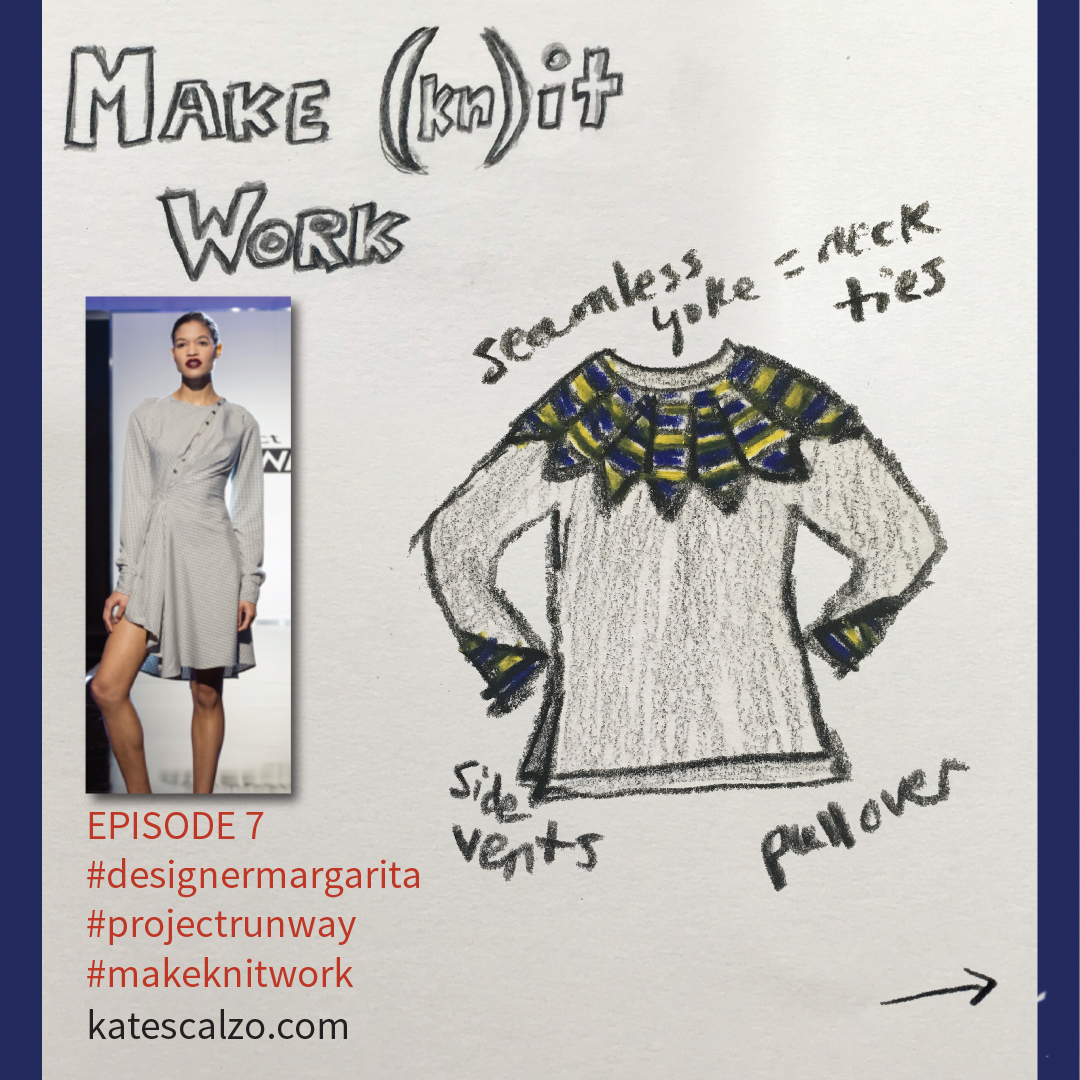
Design #1 is a pullover sweater with a seamless yoke. The yoke is an array of necktie-inspired designs, which can really be taken in a multitude of directions. I went with stripes for the concept drawings because it got the point across, but you can get creative with it, for sure! 

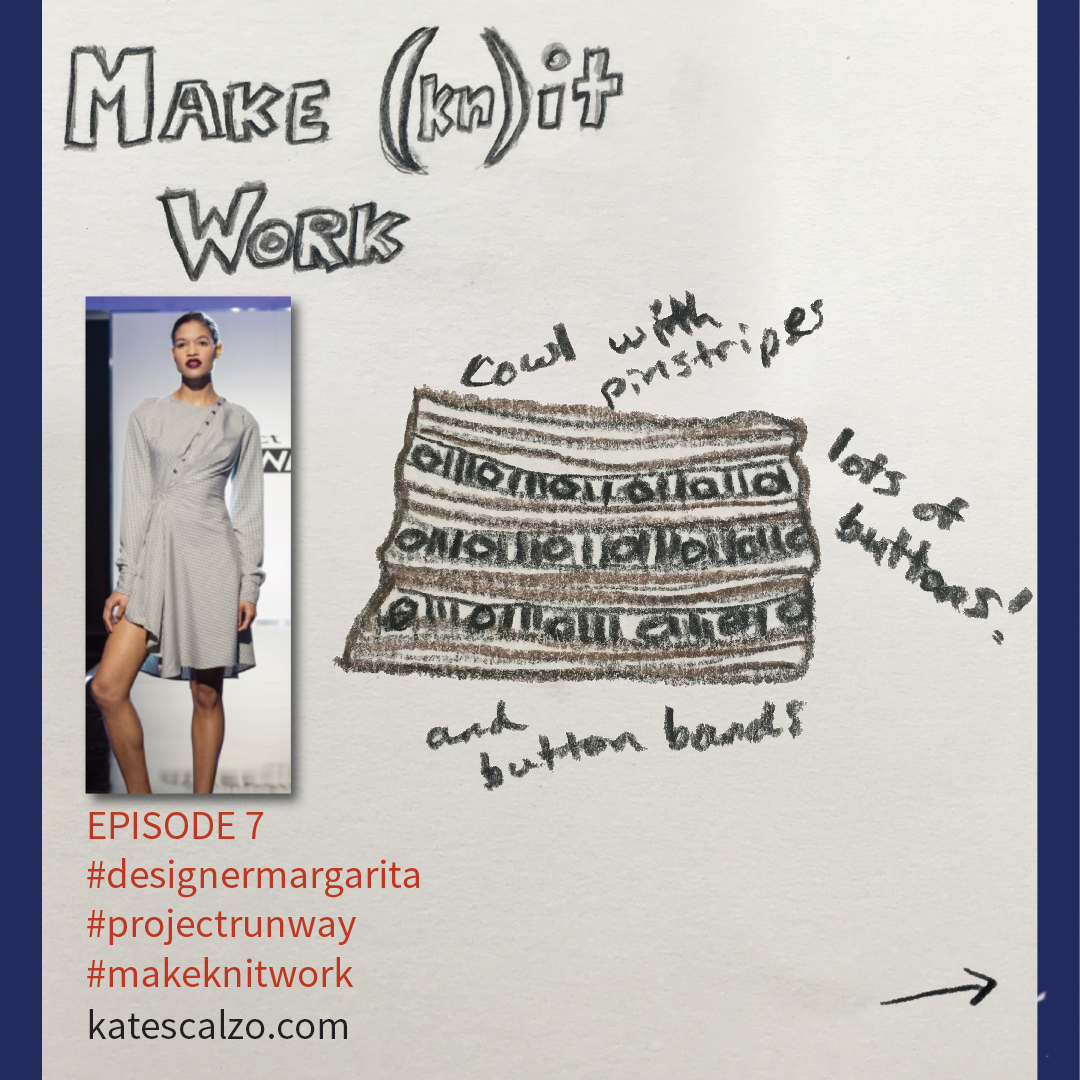
Design #2 is a cowl which I'm tempted to take on for my next pattern once my super badass, awesome, killin' it cropped motorcycle jacket is complete. Basically, it's a bunch of thin cowl-length pieces with buttons down one edge and buttonholes down another. Several of these can button together to make a wider cowl. You can switch up colors and designs by swapping out strips. Seems fun and versatile, once you get all those buttons sewn on (ugh).

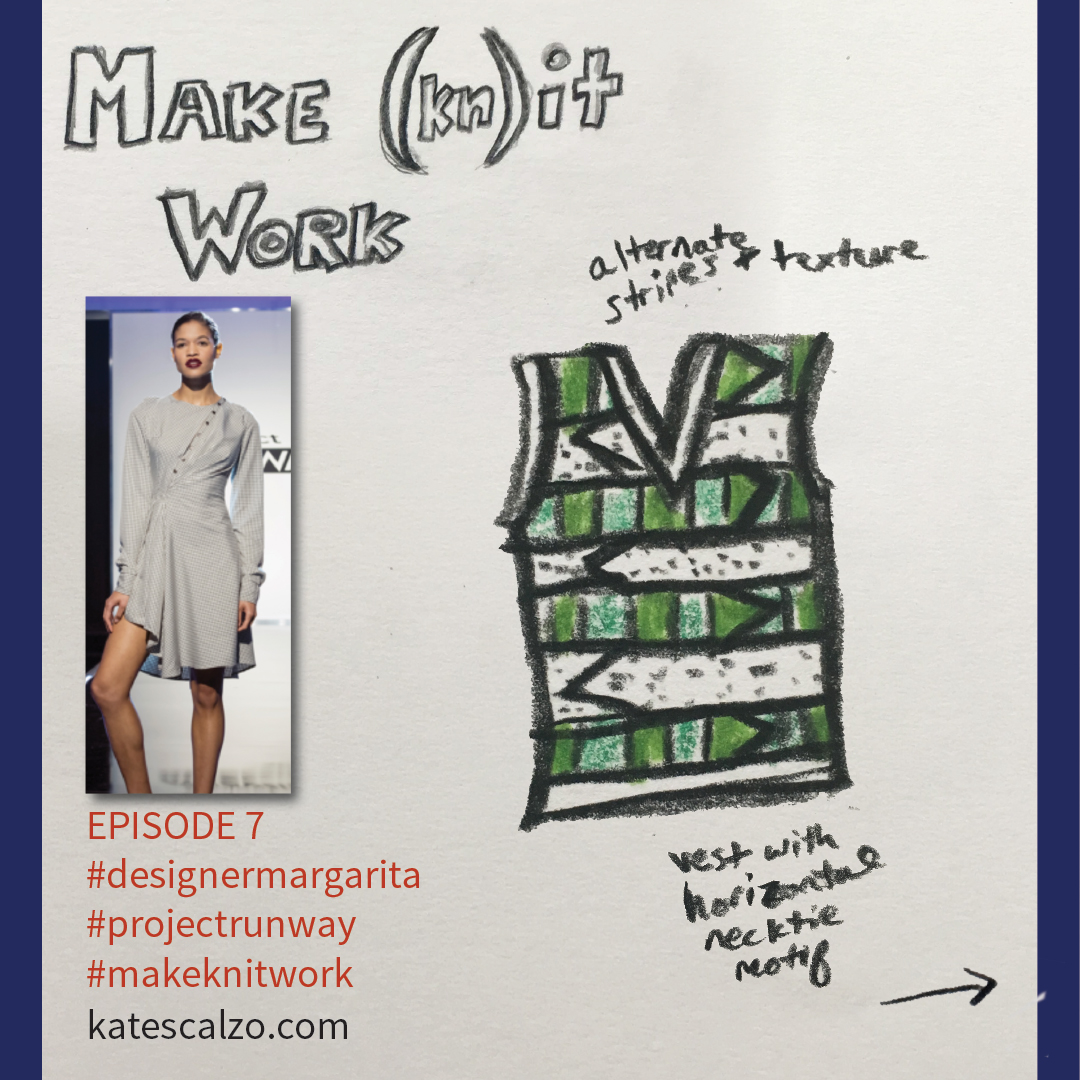
Design #3 is a vest, since that seems pretty menswear-y. The necktie idea comes into play as a horizontal design feature, where the points of the "ties" make this interesting geometric design. Alternating ties that feature color work with those that are monochromatic but textured makes it extra interesting. I want to make this one, too!  

Remember, if you want to participate, please share your sketches using the hashtag #MakeKnitWork on Instagram and Facebook!

Make Knit Work: Episodes 5 and 6

What's up, family? Are you runway ready? By ready, I mean, have you created a runway in your imagination? Good. Here are the two latest Make Knit Work installments! I posted Episode 5 on social media but totally forgot to put it up here. Oops! Or, as my newly minted 2-year-old says, "Ooooooooot." 

Episode 5 was a challenge about tone and feel, with the inspirations being "Good vs. Evil." Since your clothes speak before you do, it's important for the designers to grasp how their looks communicated these basic concepts. Brandon Kee's "good" look had a sweetness to it, but also steered away from tropes of innocence. She was still dressed like an adult, but straight-forward and well-intentioned. Brandon seems to be exceptionally sweet, himself, so I think it was a good fit (no pun intended).  

For my first sketch, I wanted to take the wrist bows in larger direction with the color blocking resembling an upside down bow across the shoulders of the sweater. For the tunic sketch, I took the straight, horizontal cut at the upper chest to inform the square neckline; and I gave it a high-low hem to resemble the "mullet dress" feature of Brandon's design. For the mitered square shell, I wanted to bring his pink striping into the piece. It's intended to be more of a pink than a red, as pictured, but I was unable to get a good approximation with the small colored pencil set I was using. All of the mitered squares are monochromatic, except for one panel in the front that incorporates the other subtle colors in his stripe pattern. 

Episode 6 was a lot of fun! It was the models' chance to be the clients and to influence the design they were wearing on the runway. Designer Kentaro took a modern (homeless, apparently?) samurai inspiration to create some really beautiful pieces for his model, Meisha. I love the oversized quality of the top with the tucked hem in the back. And the shorts (skort? culotte?) were suuuuuuuper cool and I want them now! I mean, it was a pair of loose-fitting shorts, with some skirt-like panels in the front, but open with a tie at the waist...AND a belt (double belt...what does it mean??). And somehow looked super cool. I was a big fan!

So, to Make Knit Work this week, I focused on the skirt-like panels, tucked back fabric, belts, and general Japanese-inspired style. For the first sketch, I used the tucked idea on the cuffs and added eyelets around the upper chest to thread a ribbon "belt".  The tuck would be constructed as a kind of box pleat in reverse..kinda. I'd have to work it out. The sweater itself is also a cropped style, like in Kentaro's top. My second design is a beanie with an over-layer like the skirt effect, "belted" around the crown to pull it all in. For my third sketch, I took a Japanese kimono style sweater, added cabling around all the edges, and some dropped-stitch "stripes" down the body. I've never worked a dropped stitch design before but it always looks interesting!

I hope you've enjoyed this exercise and would like to participate with me! If you're interested in sharing your design ideas, use the hashtag #MakeKnitWork on Instagram and Facebook. After all, one day you're in, the next day....you're still in because art is fun and I'm not here to judge you. :) Tata!

Free Halloween Knit Pattern: Elphaba beanie

Halloween is just around the corner! Even sooner, really, if you're DIY-ing it. This would be a good opportunity to start your Scarfigan if you're going with a Harry Potter or Doctor Who theme, but my sister provided another costume opportunity that I just had to share with you. 

Elphaba wearing her signature beanie. Photo from Wicked the Musical's Instagram account,

During their recent trip to NYC, my sister took her girls to see Wicked on Broadway. SUCH a great show! My niece, Noelle, decided that she wanted to be Elphaba for Halloween this year and needed a beanie for her costume. It appears that Elphaba's actual beanie is a simple, openwork crochet pattern with almost no brim/edging at the bottom and lord knows I cannot crochet for the life of me. This design, called "Elphabulous" is for us knitters who want the same effect! And it's FREE! Happy Halloween! 

OwenElphaba.jpg

Elphabulous

Size: One size. This hat was made for a 10-year-old but also worked fine for myself and my 4-year-old.

Yarn: Knit Picks Comfy Worsted in Planetarium, 75% pima cotton, 25% acrylic, double stranded, 1 skein divided into two halves OR  2 skeins to draw from simultaneously

Needles: US 10, 16" circular and dpns

Notions and tools: stitch marker, yarn needle

Finished dimensions: 9" across and 5" tall, laying flat

Pattern:

CO 48 sts, working with two strands as if they were one. Join in the round and place beg of round marker.

Round 1: knit

Round 2: *yo, p2tog, rep from * across round (I just p2tog with yarn in back to make the yarn over)

Repeat rounds 1 & 2 until hat is 3” long, ending on round 2.

Continue alternating rounds 1 & 2 throughout formation of the crown. Work your decreases on every knit round :

Dec round: *k6, k2tog, rep from * to end of round

Dec round: *k5, k2tog, rep from * to end of round

Dec round: *k4, k2tog, rep from * to end of round

Dec round: *k3, k2tog, rep from * to end of round

Dec round: *k2, k2tog, rep from * to end of round

Dec round: *k1,, k2tog, rep from * to end of round

Dec round: *k2tog, rep from * to end of round

Break yarn, thread through live stitches and cinch closed. Sew in and secure ends. No need to block!